Monday, January 3, 2011

Painting and Eye Candy

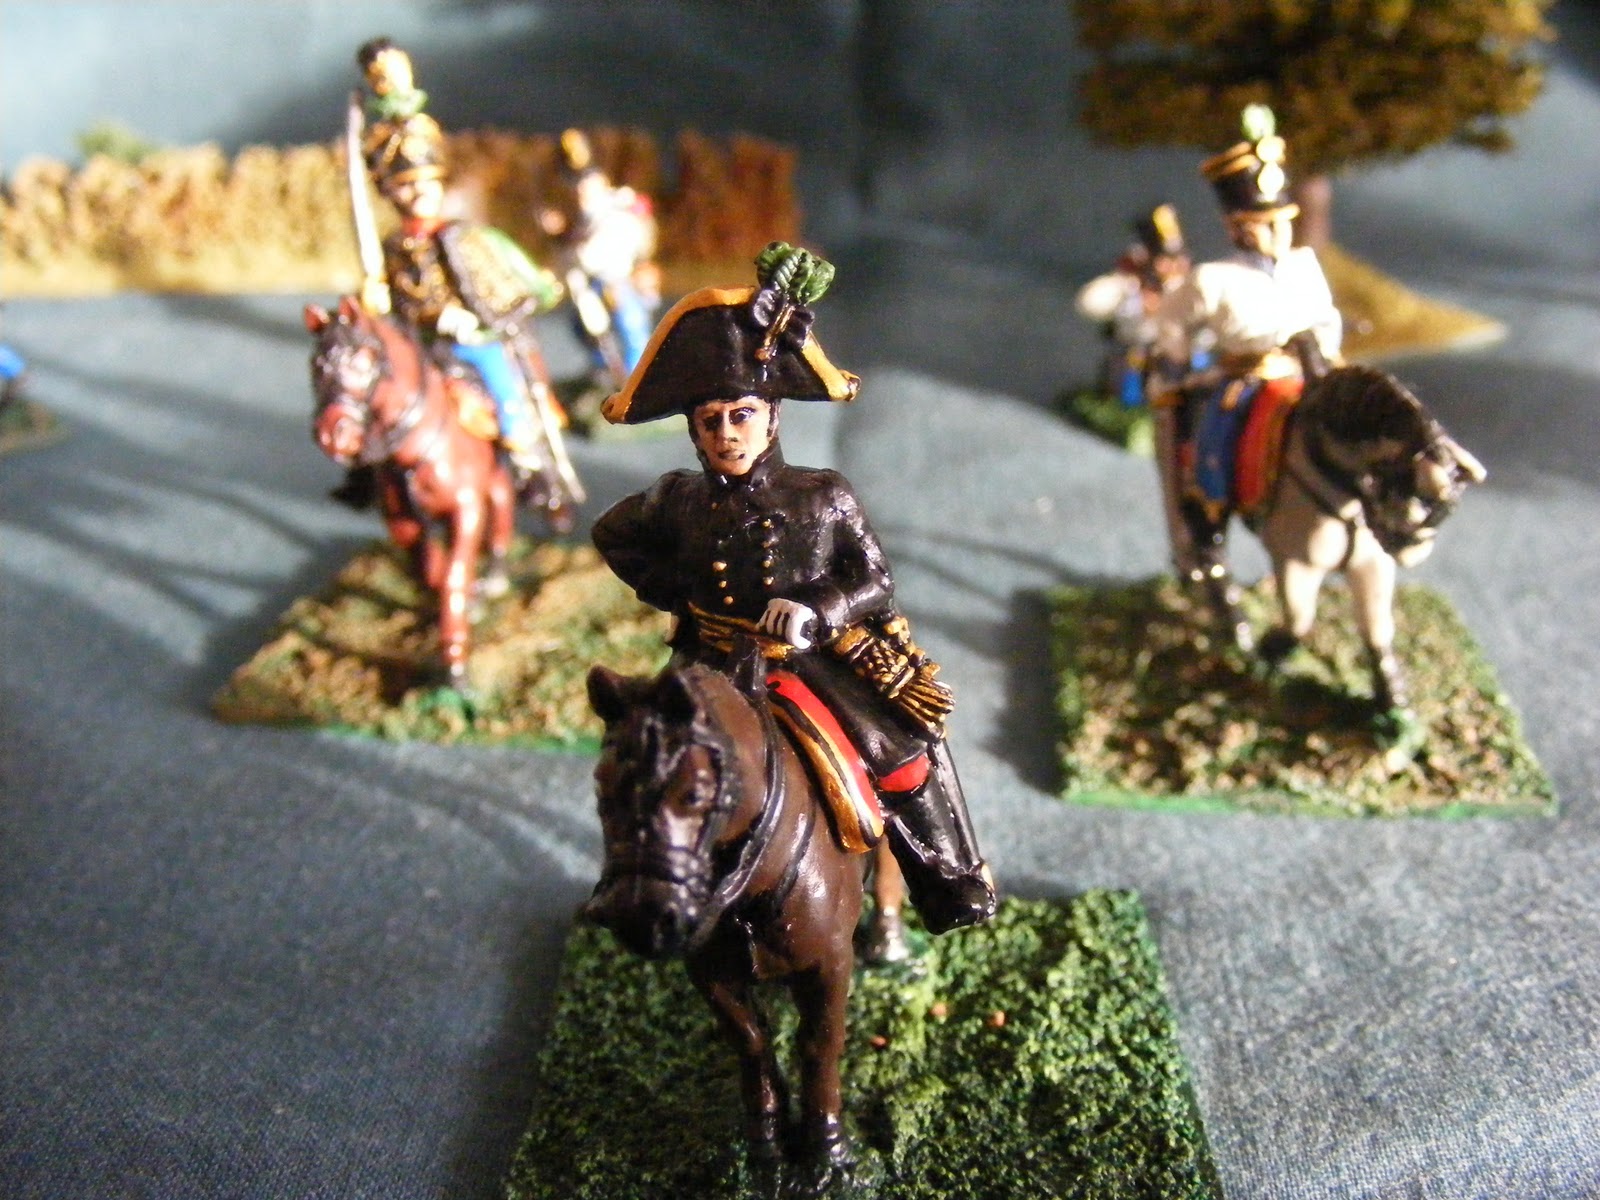
Les Blancs RdeLi 68e


Eye Candy


Of course it appears that I have not painted much, this is not true but rather it has taken me until now to get some photos done.


Return of the Tricorns

Camposanto rumbles slowly on and I have managed to complete the 2nd battalions of regiments Lombardia and Diesbach and the first battalion of regiment Schollemberg. I Have not sorted out the colour for the second Lombardia battalion as yet, but here are some pics of the full regiment of Diesbach.

Regiment Diesbach


Meanwhile at Camposanto only one battalion of Schollemberg was present, so I have done it as the first battalion with the appropriate King's Colour as opposed to the regimental one.

Regiment Schollemberg


1792

IR33
I could not resist doing some samples of the new Eureka miniatures 1790's range. Luckily they do not seem to be focussed on Italy in 1796, as my main interest is the Austrian Netherlands 1992-1794, a longer campaign with lots of big and small battles.

Les Blancs

So I painted the French samples asd Les Blancs regiments who were involved in the first catastrophic French invasion of the Austrian Netherlands, and some Hungarian infantry from IR33 that was present at the first battle of the French Revolution


O'Donel Freicorps

The trouble is that the Eureka stuff is very expensive, so I got some samples from Wargames Foundry to paint up as O'Donels Freicorps. Originally raised in 1790 to help carve up Poland this band of cut throats, freebooters and opportunists were in it for what they could get out of it...my sort of people.


K

Diary of General Ramble

General de Brigade Barbanegre


First of all I feel that I ought to apologise for not having posted much in 2010. Health-wise is has not been a brilliant year, it being hard to focus on my gaming or, indeed, finding joy in it. Depression takes you that way sometimes...

That said we did do some interesting games in 2010, such as Heilsberg, Auerstadt and Bussaco, although I was not personally enthralled with any of them.

Heilsberg, though I was keen on us fighting such an unknown battle, saw me doing very little of interest. I did have the chance to interact and mentor some of the younger players, which I enjoy as well as being very important in terms of growing a second generation. But the French did not attack and all my wing did was stand there.

Towarczy in line
Auerstadt was different in that I was in command and playing Brunswick. I had not been keen on playing this game at all as it seemed ludicrously one-sided historically and to make it even was to indulge in some sort of fantasy: if you want fantasy go buy some elves. In order to make it even the umps decided to include Bernadotte's corps and two Dragoon divisions, along with hemming the Prussians in with C2 rules. The result was that the Prussians lost all their advantages but had a whole host of disadvantages. I tried to make it interesting by retiring to a separate room and commanding by map and courier, only moving on to the table after lunch. This, at least, made it a good experiment.


Prussians in square at Auerstadt


Bussaco I was umpiring, again in a quiet sector of the line. The British commander seemed indifferent to the game and seemed more motivated trying to sell off some figures to the other players. The Brits only sprang to life when he left early and the driving seat was occupied by Chaim Ben-Zion (our very own Moshe Dyan), but it was too late to move troops about to stem the French breakthroughs.

Legere Officer


Games 2011


Legere in column


Hopefully 2011 will be better. The first game on the calendar is to be Hohenlinden. This was going to be in December 2010 but bad weather (very historical) saw it moved into January 2011. As it is an Austrian army I am down to command it. This battle seems based on a late 18th century military handbook with several concentric columns moving independently towards an objective. Unfortunately the columns are moving through a huge snow-encrusted wood with heavy freezing fog and snowstorms in the morning. This makes it almost impossible to co-ordinate the columns, and in game terms once the commanders are issued their orders they plunge into the woods and the army commander trusts it all to fate. It should certainly prove to be interesting.


Prussian Fusiliers, 2nd Westpreuss Regiment


Bautzen also appears on the dance card. Now why start with the second major 1813 battle as opposed to doing Lutzen is a question I have not yet asked, but I am keen not to over complicate matters. I have drawn the role of Blucher (the greatest living German TM) which is a personality so totally at odds with my own I have no idea what to do about it. Peter Burke, now there is a natural Blucher (the greatest living German TM), but not me. This game will also see, hopefully, a new departure. One club member has suggested using a game as a team-building exercise, ideally for a legal company. I suggested Bautzen given the need for the French to co-ordinate their operational moves to trap the allied army against the border of the then neutral Austrian Empire. The idea seems to be to allow the French to be commanded by this team along with a sprinkling of experienced players. The higher you get up the command tree arguably the less you need to know about the nuts and bolts of the rules and the more you use what really amounts to common sense. If it comes off it could be both a good income stream for the club and a source of additional players. What we must ensure is that they feel that they are getting good value for money and have fun.

O'Donel Freicorps

Also on the books are Novi, Fuentes de Onoro and Albuera. I will umpire at the last two as I always umpire in Peninsular games. Novi (I know there are four battles of Novi in 1799, I am assuming this is the one where Suvurov fell asleep) offers me the option of playing one of my Austrian heroes, Paul Kray. Kray had already beaten the French army in Italy at Magnano in 1799 before the overblown Russian general had even arrived. He then went on, alongside Chasteler, to be one of the most successful Austrian figures of the allied war effort in Italy. He was then, of course, a victim of over promotion, being sent to Germany in 1800 to succeed Charles (who had also had a good year) and was defeated by Moreau.  So I will be pitching to play him at Novi.

Painting in 2011

1st Silesian Hussar Regiment

There is a painting plan for 2011. Actually it holds up to better scrutiny as a lot is focussed around Bautzen. I am always far better if I am painting to a fixed event, so bringing forward Bautzen meant bringing forward the Prussians. My intention was that, for 1813, I would provide 2nd Prussian Corps and was looking at 2012 as the year I would do this. Bringing forward Bautzen meant completing the regular elements of the Prussians before March-April. That amounted to 12 battalions of infantry and one regiment each of Dragoons, Hussars and Uhlans. So I have already started and some of the results are below. I still lack standards for these, but I will be poking Graeme Black at GMB for these and more.

2nd Silesian Landwehr Cavalry

But it cannot all be Prussians. I would go mad;  I always try to mix at least two projects at the same time or it can be a bit monotonous. So I have started seriously on my Wurttembergers. I had thought long and hard about which Confederation country to tackle. Hesse-Darmstadt, Baden and Frankfurt all looked too small, unless I combined all three. But there was the issue of well-designed accurate figures for all of them, and they did not seem to exist. North of the Main that left Saxony and Westphalia, but for a start I did not want to do white again and the quality of the infantry put me off. Bavaria? Well, good figures were available from Front Rank, but everyone does Bavarians as in that cornflower blue uniform and raupenhelm they look natty.

Wurttemberg Colonel Prinz Paul Regiment

So I landed on Wurttemberg. Eight decent infantry regiments, not large and with a raupenhelm and nice facings, form the bulk of the army. There are also four good light infantry battalions, two of which are jager, which seem to have done very well in 1809. Four regiments of light cavalry are also nice to have. There are also two horse and up to two 12lb foot batteries, all with Austrian-style guns. That is the stuff that went on campaign. To add to this are the four guard cavalry squadrons, two guard infantry battalions and the Dragoon regiment.


As you can see I have started with the line infantry, as Pete Morbey at Elite has begun designing the range. Pete tells me that he will be adding to the range in 2011 so by the time I have finished the infantry he may have come up with other stuff I can make a start on. Here, again, GMB will be coming up with the flags.

Lets see how long this plan stands up when it gets to contact with the enemy.

K

Friday, December 3, 2010

Aspern-Essling: the battle


The First Day

After an initial briefing of the Austrian team we transferred to the main hall and were able to see for the first time what the French had over the river. I was immediately relieved: the French did not have all three Cuirassier divisions over the river, indeed they looked to have only one and some bits and pieces of light cavalry. Instead they had thrown the main weight of their forces onto their left to garrison Aspern and its environs. 


            The Austrian plan then unfolded. Hiller and Bellegarde began to ponderously roll onto the table and take up positions before Aspern. The assault on day one began with some hard fighting on Hiller's part as he attempted to approach the walled churchyard and the rougher ground to the south. He had a tough job here as the French defence was heavy and the fighting was intense. Bellegarde, meanwhile, was to attack Aspern's western elevation between the churchyard and the bund. It took him some time to wheel his Korps into position and prepare a division-level attack. 


            Then Hohenzollern's Kolonne came on to the table and began to cautiously maneouvre into position parallel to the bund whilst using his cavalry as a linking arm between his formation and Bellegarde. As he was undertaking this move the French launched their Cuirassier over the bund against him and, in almost a direct mirror of history, his infantry closed up their files and the cuirassier proved unable to penetrate his masses. As the cuirassier faded back over the bund, Liechtenstein was deploying his cavalry on Hohenzollern's left. A cavalry battle then began to develop as Liechtenstein's reserve covered the left of Hohenzollern's Kolonne and the right wing of IV Kolonne as it advanced against Essling.


            What was now clear was that the French had robbed Peter to pay Paul: Essling was lightly defended. The unknown figure of Brett Smith was quite clear that this gift was to be exploited and began a determined and ultimately successful, assault on Essling.

'Who are that lot?'

This was music to my ears as Rosenberg arrived with V Kolonne. Napoleon was clearly not expecting this formation and it was clear that the arrival of Rosenberg had thrown a real spanner into the works of the French plan. It was by now very clear that they had opted for plan C (see my previous post) and V Kolonne was in the way. As Rosenberg's infantry assaulted the walled garden east of Essling his cavalry faced off a growing force of French horse between Essling and the river. IV Kolonne happily transferred all its cavalry to V Kolonne's area too giving Rosenberg four big regiments to slow up the French.


            But by this time the day's assault against Aspern had not gone the way of the Austrians: Hiller was stalled and Bellegarde's assault had been repulsed.   


But the effect had been to tie down the French and stop them shuffling troops over to Essling. Hohenzollern had seen off the French cuirassier and had started rolling towards the bund. Essling, though, had seen a significant Austrian breakthrough. Brett Smith had gained control of most of the village using a combination of artillery to blast breaches and big Austrian battalions to assault. V Kolonne had not taken the walled garden, but had bounced the French out, so both sides peered at each other over the no-man's land of the place itself.


            And what had I done? Very little is the answer. The local column commanders had proved perfectly capable of running their own battles and I pretty much left them to it. Despite the odd hiccup the overall plan was working well. I had every cause to be satisfied with the day's results: Essling had effectively fallen, V Kolonne had stymied the French line of advance and the assault against Hohenzollern had failed. Even though we had not succeeded in taking Aspern, the assaults had tied down the French nicely. The only really significant thing I did was to bring up the Grenadiers behind Hohenzollern towards the end of the day. Overnight I stitched together an ad-hoc division of survivors from Hiller's and Bellegarde's lead assaulting divisions to act as a reserve to the right wing. Otherwise the line was tidied and redied for morning.


Day 2

It became obvious on the morning of day two that the French had decided to try and break through on their right as originally planned. There was really no choice now, as Hohenzollern and Liechtenstein nicely filled the gap between Essling and Aspern and looked like a formidable challenge for any French units electing to struggle over the bund. They had also erected a battery on Lobau to fire on Rosenberg's flank: Guard 12lb were going to be very uncomfortable for him. It was at this point that gamesmanship intervened...


Fate Cards and Supersulk

Now I am not a particularly impatient man, but I do get very irritated indeed by unfairness. When the game started the two commanders were given fate cards at the initial briefings. We were told by the umpire that attended our briefing that they had to be distributed by the CinC to all players before the game started: the CinC could not hold any back. So this is what I did. For day two we got another set of cards to be distributed in the same way. So far so good. But, early on day 2, an umpire spotted that the French CinC was distributing cards at need during the battle: in other words cheating. 


            The response to this was that the umpire whose idea this was decided to remove the cards from both sides. I was incandescent with anger at this. We, my entire team, were being penalised because the other side had been cheating. I was angry, more angry than I had been in years: only a game I know, but this was more about fairness and justice than actual quibbling over an angle or a dice throw. So, for the next few hours I opted out. When I am angry this is by far the best approach: I took out my little computer notebook and did some work for 3 hours until I calmed down. Liechtenstein ran the battle. 


Endgame

Eventually I calmed down and returned to the table. what I saw was hardly displeasing. On the right the French had set fire to Aspern and abandoned it, the flames rather than the French were the obstacle. In the centre Hohenzollern and the remains of the reserve cavalry had closed up to the bund. Essling was now totally in Austrian hands. Rosenberg with V Kolonne had been bent back ninety degrees but was still anchored on Essling to his right. Behind him now was one of the two Grenadier reserve divisions, and he had effectively contained the French assault without collapsing. 


            Of the French, meanwhile, there was now a stream of infantry heading for the bridge over the Danube. The centre was screened by French cavalry ready to pounce on any Austrian unit trying to cross the bund with the consequent disorder. 'You could win big here, John' one of the umpires said to me, but I am too much of a Habsburg general to want to risk the army in questionable maneouvres, and crossing the bund in the face of cavalry was one of them. In fact I had achieved my own objectives as set out in the Dispositionskarte: a limited but clear victory over the French.


Conclusion

As Richard Shilvock commented after the battle 'It was a good, clear plan and all we had to do was follow it'. This was in response to me thanking the Austrian team for their time and skill. the key command appointments seem to have all worked well: no-one was out of their depth. Tom Burke as Rosenberg had the most difficult job, but my faith in him was well rewarded when his line bent in the face of the main French attack, but did not break. The plan, in that sense, worked pretty much as written. We had not taken Aspern, but would have occupied the smouldering ruins at a later stage. 


            Meanwhile, freed from having to command troops as at Eylau and Sacile, I was able to concentrate on actually commanding the battle. This was a big relief, especially as the commanders proved more than capable of doing their bit effectively without my intervention. The fact that I could be absent from the field for 3 hours just underlined this. A good game, but with a big speed bump in the middle.

K


Aspern-Essling: An overview

Introduction

The next big game was going to be Aspern-Essling, a very different kettle of fish from Sacile for a whole host of reasons. It was due to be a two-day event, our first in the group. The upshot of this in my case was I volunteered to sleep in the hall at Liphook to keep an eye in the figures rather than splash out on a vast amount of insurance. With my inflatable mattress and plenty of bedding I was perfectly happy to do this. Besides, as some of the figures were going to be mine it was as much a matter of self-interest than anything.


Pre-game issues

There were, broadly, two of these. The first was the rules for Mass. The French at Sacile had been unhappy about the rules for Mass (column to solid square within a quarter move) but the use of rapidly forming solid squares was going to be critical to Aspern-Essling in my view: ask any French cuirassier...This involved a lot of to-ing and fro-ing with David Shepherd regarding how these rules were going to work. I dug my heels in on this point as I had been using Austrians for over 20 years and felt that I was right, borne out by the evidence.
The second one was with Trevor Maroney over the map. Initially Trevor had the ditch and bund curling around the outer edges of both Aspern and Essling creating a moat around both villages. Not only was this inaccurate according to all of the half dozen maps I had, it was also going to make attacking the villages almost impossible. This involved a flurry of emails including scanned maps plus evidence of my own eyes (I had walked the battlefield myself in 1994) and Trevor finally changed it.


As an aside, during the 1994 visit I had gone to the excellent museum at Deutsch-Wagram but also the Granary at Essling. In here was a large, inaccurate and confusing diorama of the battle under a perspex cover. It was staffed by an Austrian civil servant in his official long green coat. He was, however, not allowed to have the lights on except when people visited the place. Otherwise he was condemned to live a troglodyte existence in the sepulchural gloom of the Granary. Must be one of the worst jobs in the world...

The Austrian Team


I also was quite careful about the Austrian commanders. Approaching the French positions with independent columns meant that more initiative than usual was going to be required from many of the column commanders, whilst as Charles I could not spend my time running around like a wet hen if I actually wanted to control the battle. That meant a careful choice of commanders had to be made.
One of the most critical was the role of Hiller. As his column was going to be first on the scene and be on the extreme right it needed an experienced player, also it would reflect Hiller's garnered experience. This role was admirably filled by Colin Boulain. Colin is a very experienced player (he had been Eugene at Sacile and Napoleon at Friedland for example) and a safe pair of hands. I could trust him not to do anything rash, and have him act as advisor to Bellegarde: their joint task being to reduce and take Aspern. Bellegarde himself was played by Charles Morris, a young player but one who had been gaming since Austerlitz in 2005. I had no qualms about giving him a big corps, particularly as his overall task was quite clear and Colin was on hand to advise.


Reducing Essling fell to IV and V Kolonne. The overall commander of both was Rosenberg-Orsini, in effect the general commanding the left. Rosenberg historically, and in the game, spent his time exclusively with V Kolonne. I desperately wanted this command to go to Tom Burke, son of another club member (Peter Burke who was umpiring) and I had made him promise last time I saw him to take part in the Austrian team. He forgot. So I spent a little while rescuing him from the clutches of the French, eventually getting his dad to intervene and remind him of his undertakings! In the end he had a great game, was tested and came through very well. V Kolonne, meanwhile, went to a player I had not met before; Brett Smith. I would have preferred Bill Scott to fill this role; he had played Frimont at Sacile and was both a known and talented quantity. But he was playing Lannes, which had me concerned that his tactical skill combined with David Ronaldson's attacking energy would be a difficult combination to contain, never mind overcome. In the end I need not have worried, indeed Brett turned out to be a skilful and determined player whose performance was outstanding.


That left the centre, and the third key appointment: the role of Liechtenstein. Not only was he commander of the Reserve, he was also Charles' deputy and one of the few Austrian generals who historically matched Charles for aggression and energy. In the game as it unfolded the role became more critical than it would normally have been. This role was filled by another relatively new player; Richard Shilvock. I had, though, played with Richard before and was comfortable with him as 2IC. Sandwiched inbetween Richard and Charles was III Kolonne under Hohenzollern-Hechiggen. This went to Alex Shepherd. Alex as a player is also young, but because his dad, David, is also a club member (and was also umpiring) he has participated in a lot of games. He had been in charge of a division at Sacile and I wanted him to have a significant command and role at Aspern-Essling. That said I was still unsure that Alex could handle a totally independent command, so III Kolonne would be ideal, as I would also be able to readily intervene.

There were other, more junior, commands played by other players under these column commanders. But I have never been keen on using the long screwdriver, so I left the issuing of orders to junior commands to the column commanders themselves.


Thoughts and planning

Aspern-Essling is a battle 'of a type', and is remarkably similar to Dresden in initial setup: one army is emplaced with its back to a river, the other is approaching it in a series of concentric columns. There is little need for reconnaissance as the attacking army knows exactly where the enemy is. There is little room for manoeuvre either as the structure of the battlefield precludes this.
With these and other thoughts in mind I began to think about planning. One criticism often thrust at Charles is that he was drawn to the villages like magnets, whilst what he should have done was mask the villages and throw a wedge inbetween. I looked at this option and discarded it as being too risky. I did not know what the French were going to be allowed to have over the Danube on the start of the game, but I could not discount the possible presence of three cuirassier divisions under an aggressive commander (Ronaldson) carving up disordered Austrian infantry as they struggled over the bund. Another factor was that shuffling II Kolonne over to the left would take a very long time, more than enough time to allow the French to realise what the intention was and counter it with plenty of artillery and heavy cavalry.


So, it was back to the original plan of attacking the villages. But this had to be married to preventing the French from crossing the bund. That meant that the attacks on the villages had to either carry them, or be threatening enough to draw the French away from the centre. So the following nebulous plan formed: Hiller and Bellegarde would reduce Aspern. Rosenberg would reduce Essling: the assault itself being the job of IV Kolonne whilst V Kolonne worked it's way behind Essling and take the walled garden. The Granary was to be avoided. In the centre the Reserve cavalry would repel French cavalry attacks over the bund, these were anticipated and would be launched to disrupt the movement of III Kolonne. This last formation was to advance steadily to the edge of the bund and bottle the French up behind it. The Grenadiers would stay in reserve around Brietenlee to be called forward as needed.


The overall aim was to imprison the French behind the bund and wrest control of the villages from them. This would trap them in a very constrained area where they could be pummelled by artillery.

Counter-Intuition

I had also tried to consider the options open to the French. Looking at things from their perspective there were only really 3 options. The first was to create a 'fortress' from the villages, along the bund and using the walled garden behind Essling as the perimeter. The problem with this was the Austrians could simply roll up the guns wheel to wheel and pound away. Besides, any army with Ronaldson and Scott in it was not going to settle for such a supine option.

The second option was the historical French one, to break out of the constraints of the position by advancing over the bund with cavalry and then as many battalions as they could lay their hands on. In other words an attack in the centre and then pivoting on Aspern whilst the cavalry covered the right.

The third option was a right hook behind Essling towards Gross Enzerdorf and then veering left to roll up Rosenberg whilst lightly holding the centre and retaining the villages.


I was not worried about option one, in fact it would have been as if I had written the French plan myself. Option two would have seen the French in a head on collision with III Kolonne and the reserve cavalry in the open. A potentially risky situation and would throw my plan out of gear, but would offer the option of destroying the French in the open. The winner of such a brawl would be the luckiest general. Option three would allow my plan in the centre to proceed relatively unmolested. But it would give Rosenberg something to think about. It would also be far more awkward to reinforce Rosenberg than it would be any developing situation in the centre.


Such were my thought processes as I prepared to fight the battle. I drew up yet another Dispositionskarte, issued it to my senior staff, and waited for the game weekend.

Sunday, October 10, 2010

Aspern-Essling: Dispositionskarte


Realising, reading back, that I have not included anything about Aspern-Essling I feel that I should as there are lots of pics and material. But, as at Sacile, I tried to issue the usual 'Army Disposition' before the game. This was the alternative to clear orders!


General Opinion

The Imperial Hauptarmee will assemble on the Marchfeld in preparation to repulse any attempt by the French army to cross the Danube. After repulsing the French on the Schwarze Lackenau their crossing points have narrowed. It is the opinion of the Hauptarmee headquarters, given observations from staff officers on the Bisamberg, that the French will next attempt to cross from Lobau island in the vicinity of the villages of Aspern-Essling. It is the intention of the Generalissimus, Erzherzog Karl von Habsburg, to take advantage of the strategic vulnerability of the French army and administer a sharp check to the Corsican ogre as he attempts to cross the Danube. Two Korps of the army will not be present. The V Korps under FZM Furst von Reuss-Plauen will cover the river upstream in the eventuality that the crossing in the Aspern-Essling area is a feint. The III Korps under FZM Kollowrat-Krakowsky is to strike out of Bohemia in the direction of Linz threatening the enemy's lines of communication.

The events of the evening of 20th April

On the evening of 20th April our advance guard forces under FML Graf Klenau encountered a French reconaissance in force north of the village of Essling. The French were repulsed with losses and we are confident that they have little idea of the proximity or scale of our army arrayed so closely to them.

The morning of the 21st April

The french forces have begun crossing the Danube in force. Observations from the Bisamberg highlight two key points. Firstly, the French bridges are not formal pontoons, but instead appear to be somewhat rickety structures that are already showing signs of stress under the pressure of the river which is swollen by snowmelt. Secondly, the French seem to have concentrated on the deployment of a great deal of cavalry to the detriment of infantry. This implies further their ignorance of the proximity of our army. This is to be divided into five attacking columns plus the Reserve Korps.

Army Orders Dawn, 21st April

The I Kolonne of FML Hiller


I Kolonne is tasked with assaulting and taking the village of Aspern from the south and west including the Churchyard. The Kolonne is also tasked with outflanking the village to the south and take the Gemeinde Au with its light forces, interdicting French attempts to reinforce Aspern.

You are to co-ordinate your attacks with II Kolonne.


The II Kolonne of General der Kavallrie Graf Bellegarde

II Kolonne is tasked to assault and take the village of Aspern from the north and west. The Churchyard is to act as the dilineating line between I and II Kolonne, and it is to be the responsibility of I Kolonne.

II Kolonne is also to act as the hinge for the wheeling advance of III Kolonne.


The III Kolonne of Feldmarschalleutnant Graf Hohenzollern-Hechiggen

III Kolonne is tasked with a wheeling assault, hinging its right flank on II Kolonne and its left on the Reserve Cavalry. The Kolonne is to advance deliberately to position itself parallel to the ditch inbetween Aspern and Essling.

Once in position III Kolonne is to conduct a solid and predictable advance against French forces arrayed along the ditch. The Kolonne is to carry the ditch in conjunction with II Kolonne assaults on Aspern.

French cavalry attacks will probably attempt to break up this movement. Caution and care is advisable while conducting this maneouvre.

The following two Kolonne form the Left Wing under the overall command of


Feldmarschalleutnant Furst Rosenberg-Orsini

The IV and V Kolonne are tasked with taking the village of Essling. These Kolonne are to be co-ordinated and under the overall command of FML Rosenberg-Orsini.

The IV Kolonne of Feldmarschalleutnant Dedovich

See above, orders to be issued by FML Rosenberg-Orsini

The V Kolonne of Feldmarschalleutnant Furst Hohenlohe

See above, orders to be issued by FML Rosenberg-Orsini

The Army Reserve of General der Kavallrie Furst Johann Liechtenstein


The Army Reserve is to deploy its reserve cavalry to cover the gap between the left flank of III Kolonne and the right flank of IV Kolonne. The first task of the reserve cavalry is to fend off any French cavalry attacks attempting to disrupt the deployments of III and IV Kolonne. In this task you are to co-ordinate with the commanders of III and IV Kolonne.

Once this deployment is achieved you are to act as a screen between III and IV Kolonne, taking advantage of any targets of opportunity that may present themselves.

The Grenadier division is to form an Army Reserve south of the village of Breitenlee.

Army Headquarters

This will commence the battle accompanying III Kolonne headquarters.


Generalmajor Graf Wimpffen

Generalstabschef

Hauptarmee